![How To Setup Spare Bedroom Home Recording Studio in [2024]](https://trackinsolo.com/wp-content/uploads/2023/02/Setup_Spare_Bedroom_Home_Studio.jpg "How To Setup Spare Bedroom Home Recording Studio in [2024]")
Are you a musician or recording engineer who wants to be able to record from the comfort of your home? As long as you have the space and time to do it, it’s definitely possible for you to be able to convert a spare bedroom into your own studio.
There are several steps you need to take in order to accomplish this daunting task. By reading this article you’ll be able to fully understand what is required for you to create your own studio. So don’t procrastinate! Finish reading this article and start making your dream of having a home studio a reality.
How To Setup Spare Bedroom Home Recording Studio – Come up with a Plan

Once you decide you want to convert a spare room into a recording studio, you need to have a plan. Think about what you want to accomplish, and how you’re going to accomplish it. An important thing to note is your budget. Having a budget beforehand will make it easier for you to see how much you’re willing to spend on things.
Be sure to take notes throughout this article to help you come up with a plan. It’s better to be overprepared than to be underprepared.
Pick The Best Room
Before you begin, you need to think about what room will work best for your studio. This needs to be a room that isn’t heavily utilized and has the potential to be a perfect space for your musical endeavors.
There are several things to keep in mind when you pick out which room is best for you. The room needs to be a reasonable size, not be loud, have decent flooring, and have somewhat decent acoustics.
Below is a list that goes into detail on what to do avoid:
Rooms to Avoid

Small Spaces
Trying to convert a small room into a recording studio will hurt you in the long run. A studio utilizes more space than most might realize; especially if you want to be able to track drum-kits as well.
The recommended size for a studio space varies, but it’s generally accepted to be roughly 20ft by 15ft by 10ft. Having too little of a space will be more of a rehearsal space than a recording studio.
Make sure your room is not only decent in size, but also has higher ceilings. Having higher ceilings will help your ability to record acoustic instruments such as a drumkit or an acoustic guitar.
Noisey Rooms
Since you’re recording, you obviously want a room that isn’t loud. If you have a room that is right by the area of your house that tends to have the most people, then consider not building the studio there.
Not only is having a quieter room for your recording studio essential for recording, but it’s also preferable to work in a quieter environment. The quieter your “work” environment is, the better you’ll be able to work. If you’re trying to edit tracks while it’s loud and obnoxious, you’ll get distracted and not be able to work at your full potential. It’s self-explanatory, but it might go unnoticed because of how badly you want to begin your studio.
Poor Flooring
The ideal flooring of a recording studio is hard flooring such as concrete, hardwood, or tile. This is due to this type of flooring being the best treatment toward your recording since carpet only absorbs high frequencies and not low ones.
Besides that, your studio will more than likely get a lot of foot traffic. A lot of foot traffic will cause your carpet to wear out, and cause annoying fixes. Not to mention the amount of gear that’ll be moved around in your studio that’ll deteriorate your floor.
If you have a big enough room that is perfect for a studio but has carpet, don’t panic. You can always fix the flooring later on and worry about prioritizing other needs of your studio first. Keep in mind that when you end up fixing the flooring, everything will need to come out. So you might not want to jump too far ahead.
Poor Acoustics
The acoustics of a room tend to go unnoticed by a musician or recording engineer while in the midst of planning out their studio. However, having the right acoustics in your room will help your recording process in the long run.
Try to pick a room that has decent acoustics. You want a room that is acoustically dead; as opposed to venues that want enhanced reverb sound rooms. Basically, you don’t want to use a room that echoes.
You can definitely use certain acoustic treatment methods to help the acoustics of the room. So keep that in mind if you find the acoustic of the room you chose to not be the best.
Obviously, you more than likely don’t have a plethora of rooms to choose from, but try to keep these in mind when you end up picking a room. Besides the size of the room, most of these can be fixed with some simple steps. However, it’s easier to pick a more ideal room than to fix a nonideal room. Don’t let these things to avoid discourage you. You can work with what you have in order to create a perfect home studio for you.
Clear Out The Room

Once you decide on what room is going to be your studio, you’re going to want to clear everything out of the room. Any furniture, items, clothes, books, or whatever, should be completely cleared out.
Doing this will make it easier on your end to create your studio since you’ll essentially have a “new” room to work with. With it being empty, you’ll be able to envision the “end” look of your studio.
Try breaking up each section of the room into what you want. For example, you might want to designate a certain wall as your “hub” or place where you’ll be on the computer recording.
It’s important to have a plan for your room. A plan is more easily done with an empty and clean room for you to pick apart. Otherwise, you’ll be working in a space that is already limited.
Acoustic Treatment
As noted before, the overall sound of your room is important. Once you have a room to record in, it’s important to treat the sound of the room. Making sure you have the right room treatment is a must for any studio. There are a plethora of ways to positively affect the sound of a room.
Before you begin treating the sound of your room, make sure you have appropriate flooring. Otherwise, you’ll only make the process go by slower and not be as effective.
Below is a list of a few things to consider for the sound of your room:
Acoustic panels are panels placed on walls to absorb sound. They’re used to help eliminate and reduce noise. Utilizing acoustic panels will enhance the overall sound of your room.
Keep in mind that acoustic panels don’t soundproof your room. They simply soak up any unwanted sound.
You can find a wide range of options for acoustic panels. You can either build your own or buy some online from different sources. It’s important to look up what kind of acoustic panel will work best for your room depending on the size of your room.
For more information on Acoustic Panels. Read our reviews for Best Acoustic Panels Review & Buyer’s Guide.
Bass Traps
Bass traps are used as absorbers to help low-frequency sound energy. This is done with the goal of attaining a flatter low-frequency room.
They’re generally placed in the corner of rooms since low-frequency pressure builds up in the corner of rooms. Besides corners, flat walls are great for bass traps too.
Just like acoustic panels, bass traps are available online from different sources or you can build them yourself. As noted before, make sure you do the proper research to find out what bass trap will work best for your room.
For more information on Bass Traps. Read our reviews for Best Bass Traps Review & Buyer’s Guide.
Floor and Ceiling

You want to make sure you have the proper flooring needed for a studio and a decently high ceiling to work with. Generally speaking, walls are easier to treat than a floor and ceiling; ceilings being the hardest.
For your ceiling, you want to put low-frequency absorption techniques throughout the ceiling because of the pressure areas you have to deal with. However, keep in mind that depending on your room, this may not be the answer. Definitely look up what you should do for the specific dimensions of your room.
With regards to your floor and ceiling, you can find options online on what you should buy or make to help treat them. Every room is different; especially the floor and ceiling of every room.
Windows
Generally speaking, you never want a window in your studio unless you can afford a soundproof window. Windows let in outside noise and can cause unwanted noise that is hard to get rid of.
There are ways around window noise through various soundproofing methods. It’s definitely easier to decide on a room that doesn’t have a window to begin with though.
If the room you end up picking has a window, don’t worry too much about it. There are a bunch of ways to get rid of that unwanted outside noise, but make sure you address it sooner rather than later.
Keep in mind how important the sound a room is for a studio. If you want to build your own home recording studio, then you need to take the time to invest in it. Skipping over these recommendations will only disappoint you in the long run and ruin your dream of having a home studio.
Essential Gear Needed
 As one can imagine, there’s so much gear that goes into a studio. It’s not like you’re a musician who just owns what they play. You need to have a little bit of everything, on top of everything needed to record.
Besides everything I already listed in this article, there’s a lot more gear needed for any studio.
Without going into too much detail, here is a quick list of some essential gear needed for a studio:
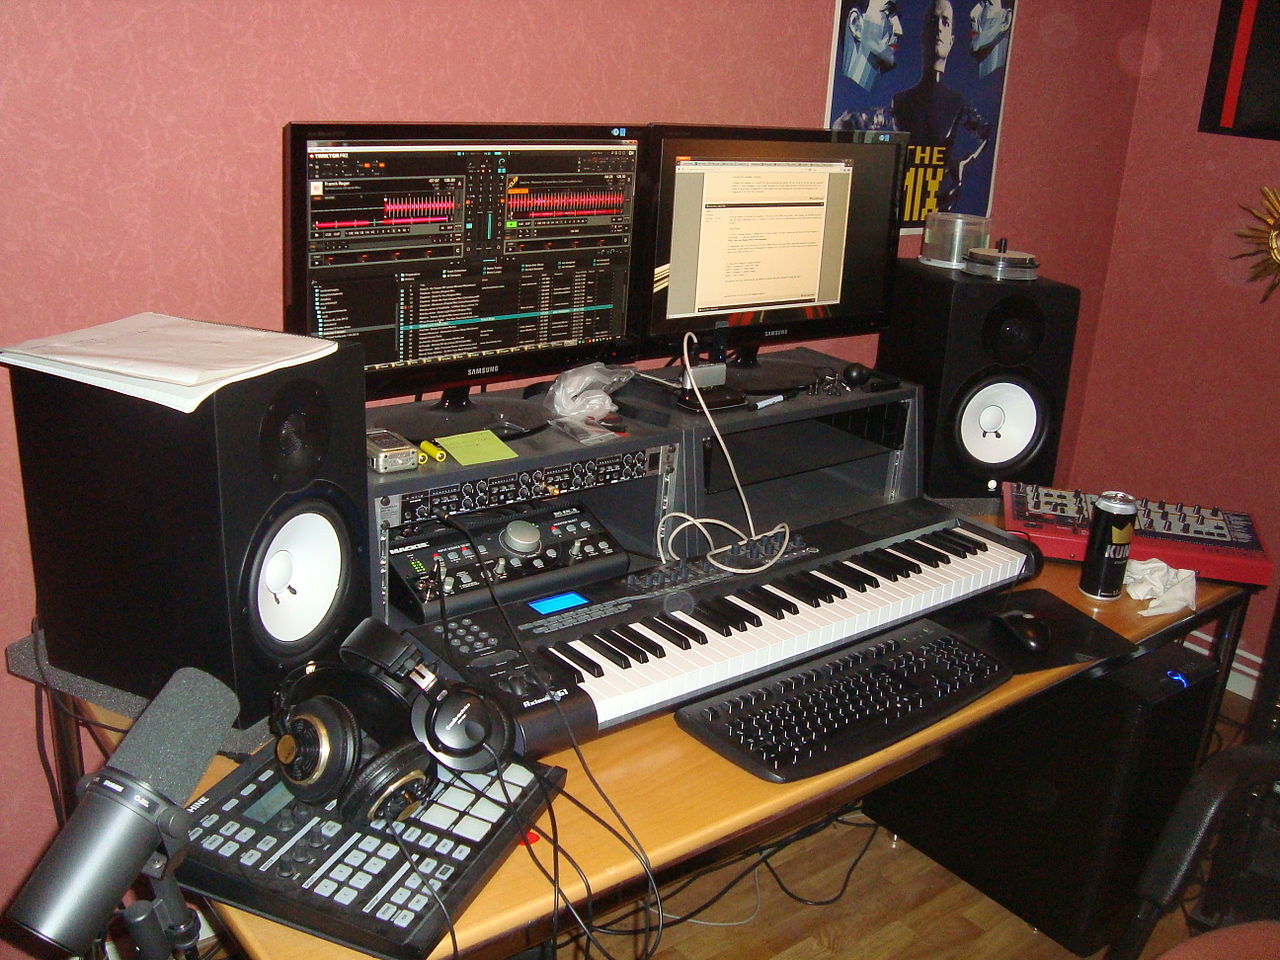
A Computer
The most important piece of gear for any home studio is the computer behind it. Your computer will be where you’ll spend most of your time at your studio, so make sure you get a reliable and fast computer. You definitely don’t want to cheap out on a computer. Otherwise, your recording projects will be met at a standstill since you’ll have a bad computer.
For more information on Computers for Music Production. Read our reviews for the Best PC’s for Music Production and Best Laptops for Music Production.
A DAW (Digital Audio Workstation) Software
DAW Software is a software that is used for recording, editing, and producing audio files. In other words, this is the program that’ll be used throughout your entire recording process. Just like your computer, you need to find a software that is suitable and reliable for you. Otherwise, you’ll just waste your time.
For more information on Digital Audio Workstations Software. Read our reviews for the Best DAW for Beginners Review & Buyer’s Guide and DAW vs DAW – How Do They All Compare?.
MIDI Controller/Keyboard
A MIDI controller is a hardware or software that generates and transmits MIDI data to MIDI-enabled devices. In simple terms, this is a way musicians and sound engineers can create drum tracks. This is very useful if you don’t have the ability to record drum tracks with a drum kit. It’s also useful to explore other genres of music, and have more of a dynamic range of options available to record with.
For more information on Keyboard Controllers. Read our reviews for the Best Keyboard Controller Review & Buyer’s Guide.
Audio Interface
An audio interface is something that expands what you can do on a computer for recording. Think of an audio interface as what you’ll use to record anything with an input like a guitar or microphone. Most studios have multiple audio interfaces, because of the wide range of sounds each audio interface offers. Be sure to find one that suits your budget to begin with, and invest in other ones once you have more of your studio completed.
For more information on Audio Interfaces. Read our reviews for the Best Budget Audio Interface Review & Buyer’s Guide.
Microphones
 There are a ton of different microphones you’ll need for your studio. Condenser and Dynamic microphones are the main two types of microphones you’ll need. Condenser microphones work better with high-frequency instruments, while dynamic microphones work better with low-mid frequency instruments. Keep in mind that microphones can be expensive, but they’re definitely something you’ll need to invest in.
For more information on All Purpose Mics. Read our reviews for Best All Purpose Microphone for Recording Review & Buyer’s Guide.
Headphones
Headphones are how you’ll be able to hear and finetune your recordings. They’ll also be used for yourself or others who will be recording. Definitely get multiple pairs of headphones for your studio. In the beginning, you can get away with just two, but you’ll eventually want to get more than just two.
For more information on Studio Headphones. Read our reviews for Best Headphones for Music Production Review & Buyer’s Guide.
Studio Monitors
You’ll need studio monitors to not only playback recordings to people, but to be able to hear the true-mix of a song. Hearing a song through studio monitors will give you the most realistic take on how your recording is sounding.
For more information on Studio Monitoring. Read our reviews for Best Studio Monitors Review & Buyer’s Guide.
Cables
Make sure you have every type of cable for your studio. You never know when a cable breaks and will need a replacement, or when a musician comes over to record and doesn’t have all of their cables. Make sure you have XLR cables, patch cables, ¼” jack instrument cables, speaker cables, and other miscellaneous cables you think you’ll need.
For more information on XLR Cables. Read our reviews for Best XLR Cables Review & Buyer’s Guide.
Arrange your Recording Stations
Make sure you have designated areas for your studio. Just like your computer hub, the more organized you make everything, the better.
You need to have a vocal booth for vocals, so make sure you take the proper steps to ensure that your vocal booth is in good condition. Make sure everything is properly treated, and that you know where everything is stored for when you record a vocalist. Not knowing where something is when you record someone will only upset the person you’re recording.
For where you’ll be recording amplifiers, make sure you have all of the cables connected properly back to your computer hub. The sound of a guitar and bass amplifiers are an essential part of music, which is why it’s important the recording process is done efficiently and well.
When you record drums, double-check that you have all the mics required to record drums. Always know where your gear is and have everything separated.
Have an area for cables, and the cables split apart by each type of cable. Have an area for your guitar and bass gear. Have an area for microphones. Have an area for tools; you’ll never know when you might need to repair something.
When you have recording stations, you want to make sure everything looks how it should. A recording station should be comfortable for whoever you’re recording. If everything is messy and all over the place, the musician you’re recording won’t be able to perform as well. No matter the size of your studio, always have a neat and organized studio.
Connect your Gear
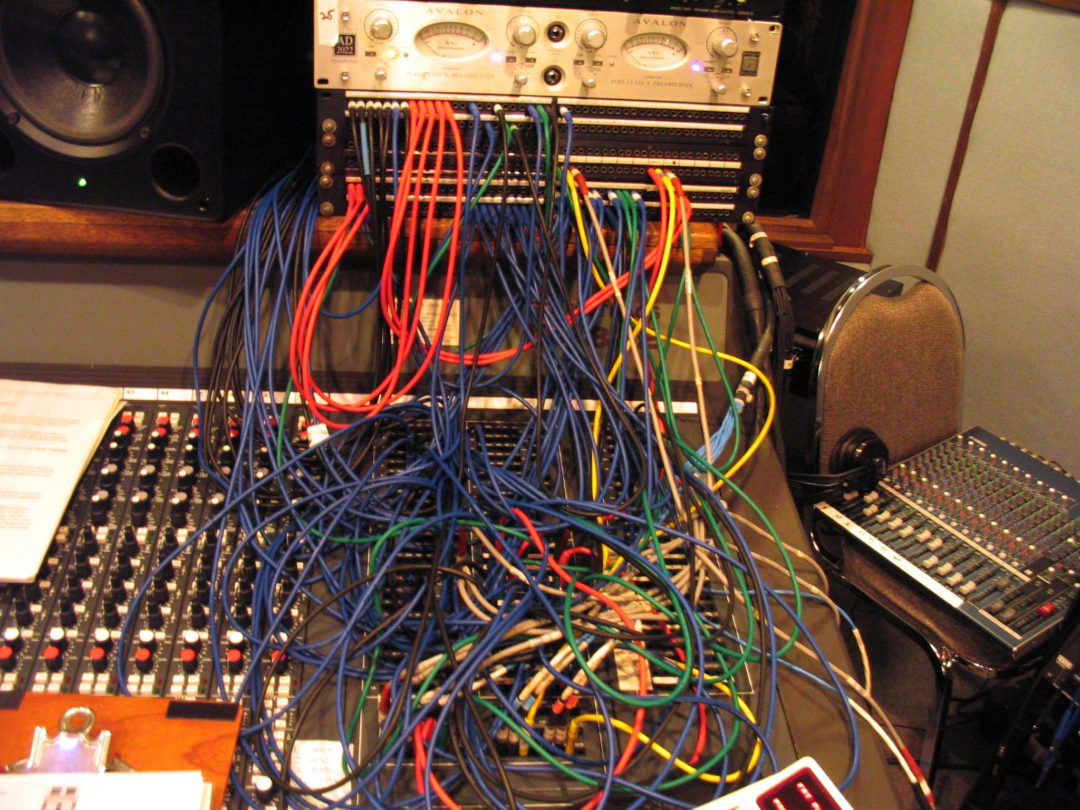
Making sure all of your gear is connected and running smoothly is a must for any studio. Once you have all of your designated areas set-up, make sure you have everything connected. Keep in mind to have decent cable management. Otherwise, your studio can end up looking cluttered and unflattering.
If you end up getting larger pieces of gear like a mixer, then you’ll spend a lot of time hooking up the mixer properly to your computer. Never rush anything because you may run into some mistakes if you rush.
Always troubleshoot everything to make sure it’s “go time” when you’re ready to record. It’s better to be safe than sorry.
Once you have everything hooked up, double-check how everything looks. If you have a ton of cables scattered around, you may want to consider other ways of connecting your gear.
Position your Studio Monitors
Owning a good pair of studio monitors will enhance your ability to record. Besides owning a good pair of studio monitors, it’s important to position your studio monitors the correct way.
You want to make sure your studio monitors are symmetric and are at ear level. If you have them too high or not symmetric, you may hear a sound that isn’t true to the actual recording. Always point your studio monitors directly toward your head. You want to make sure you are fully encompassing the sound that is coming out of your studio monitors.
Make sure your studio monitors are away from corners and walls. If you have your studio monitors near a wall or corner, the sound will be dampened and will ruin the output of the recording.
If you feel the need, you can add bass traps behind your studio monitors to help the sound of them. This isn’t necessary, but if you’re a perfectionist then this will definitely help.
Often Forgotten Gear
As noted before, there’s a plethora of gear needed for any studio; especially for a home studio. Sometimes when you’re planning and building your studio, there’s a ton of gear that ends up being forgotten about because of the fact that it might not seem as required.
Here is a list of gear that is often forgotten:
Furniture
Besides a desk and a chair for where your computer will be, furniture is an important part of a studio. You may want to consider getting an extra couch for any late-night recording sessions that may end up with a musician or two crashing on your floor. Having multiple chairs is a must since you’ll never know how many people will be in your studio at once.
Extra Strings/Sticks/Guitar Picks
Always have extra of everything. You never know when you might need something. You’ll more than likely run into a point where a musician forgot a guitar pick or they broke a string. Being able to pull-out exactly what they need will not only save time, but make everyone feel more relaxed.
Having an abundance of everything will save that unnecessary trip of going to your local music store to only find out that they ran out of what you need.
Tuners
") When recording, the most important thing that a person needs to accomplish when recording is being in tune. Having a chromatic tuning pedal is great for instruments that can plug directly in via a ¼’ jack instrument cable.
When recording, the most important thing that a person needs to accomplish when recording is being in tune. Having a chromatic tuning pedal is great for instruments that can plug directly in via a ¼’ jack instrument cable.
I also recommend buying a few clip-on tuners. You never know when these might come in handy. Regardless, you’ll need them to record an acoustic guitar anyways. Luckily, tuners are very cheap, so you don’t have to worry about spending too much on them.
Guitar Pedals
Guitar pedals aren’t just great for manipulating the sound of a guitar, but are great for studios. Even if you don’t play guitar, you can utilize pedals to manipulate a plethora of different instruments you might end up recording. There’s such a wide range of pedals, but definitely do some research and get a bunch of pedals to play with.
Consider getting a reverb, delay, chorus, and distortion pedal to start with. If you’re a guitarist, I’m sure you already a ton of pedals to begin with, so make sure you utilize them with your studio.
Extension Cords
Multiple outlet extension cords are your best friend when you have a studio. Think about how many outlets you have in a room. If you’re lucky, you have two to three total. By having multiple outlet extension cords, you’ll be able to efficiently plug-in everything that needs to be plugged in.
No more worrying about that band that has five guitarists. You’ll have enough outlets to plug everything in and be ready to go.
Phone Chargers
Although this has nothing to do with you, you won’t realize how many times a musician will be at your studio and ask for a phone charger. Although this doesn’t seem like your responsibility, this goes back to the idea that a happier and more relaxed musician will be able to record their parts better.
It doesn’t hurt to have a few extra phone chargers lying around, especially since they’re so cheap. You never know when a vocalist insists that they need their phone to look at lyrics, and then their phone dies. Rather than watching a meltdown of a vocalist, you can assure them that you have the answer to their problem, and everything will be okay.
Label Maker
Since you’ll have so much gear in such a small space, it’s important to have everything labeled. You might think that going off memory will be easy for you, but this will eliminate you having to explain to someone where something is. You can simply tell them to grab whatever from a desk, and they’ll see the label where it is located.
It’s better to over-label than it is to not label anything. It’s most important to label desks and drawers with regards to where certain items are.
A Notebook
Always have a notebook near you when you’re recording. Even if you’re just recording yourself for fun, have a notebook near you. You never know when you might have an idea or something you learned.
It’s easier to quickly write something down than it is to try and remember it. You’ll more than likely forget whatever it is you wanted to remember unless you write it down. Even if the majority of the stuff you write down ends up being useless, it’s better to get in the habit of writing stuff down than it is to not write at all.
You can keep notes during a recording process, write out ideas, etc. It’s really open to whatever you want to write, but having a notebook nearby will help you more than realize.
Tools
Have a basic toolkit. You never know when you might have to do a quick repair on something or when a musician asks you for a repair. Plus, you can probably use some of the tools for your own home studio anyways.
Additional Tips
Turning a spare bedroom into a home recording studio from scratch can be overwhelming for most. Although it is actually a lot faster than you might realize. Just remember to not jump too far ahead of yourself, and to do a lot of research on whatever it is you want to accomplish with your home studio.
Here are some additional tips for building a home studio from a spare bedroom:
Be Patient
When you’re in the process of converting a room into a studio, you’re going to run into some issues and it’s going to take a long time. You need to realize this and stay patient. No matter how much you’re investing in the project, it’s not going to magically come together tomorrow.
People with million-dollar studios are always looking to improve and add to their studio, so why would you expect your studio to be “finished” by tomorrow? The reality is that your studio will never be “finished”. Once you start building it, you’ll constantly come up with new ideas to improve it.
Don’t be afraid to ask questions
If you’re clueless about something, don’t be scared to look for help. There are countless resources online that you can use to help you with your studio-project. Anything you have a question about will more than likely have an answer online.
You can also use this to influence how you want to go about building your studio. Try looking up home studios and how they went about building them. You may find answers to your questions, and some ideas that’ll help you.
Reach out to people
If you know anyone who is familiar with this subject, ask them for advice. Even if you just know a sound engineer who works at a local recording studio downtown, reach out to them. They’ll be knowledgeable in the sense that they’ll tell you what you need and don’t need.
Talking to experienced people in certain fields will always help your ability to understand that field. Especially in regards to recording music.
Have goals
No matter what you want to accomplish with a home recording studio, it’s an investment. An investment deserves a list of goals. Try to give yourself an outline over the next few years on what you want to accomplish with your studio.
An example of a goal would be that you want to have everything running within a month, and have your first paid client within three months. Create long-term and short-term goals as you see fit for yourself.
Q and As

“How much does a home studio cost?”
A home recording studio depends on how you define a recording studio and how much you want to spend on a recording studio. You can build a barebones home studio for $200-dollars and spend as much as $20,000-dollars if you really wanted to.
If you want to build a professional-quality studio in your home, then you’re going to have to spend at least several thousand dollars. Keep in mind that this doesn’t mean you have to spend all of this money right at once. It’s just the overall investment you’re expected to put into your studio.
As noted before, a studio tends to be a never-ending investment. As long as you want to continually improve your studio, the more money you’ll continue to put into it.
If you only want to record demos for fun, then you can definitely get away with just investing a few hundred dollars toward an audio interface/microphone package.
“Are recording studios dying?”
Short answer: No.
Long answer: Today, the number of studios is at its highest because of the sheer number of home studios. However, people paying to go to a studio isn’t as high as it used to be since more people record their own music today. This doesn’t mean that recording studios are “dying”.
Recording, in general, has become more and more popular over the years because of how accessible it is. Gear has become more affordable and the ability to build a studio in the comfort of your own home is great. Most professional recording engineers have adjusted to this, and have come up with multiple revenue sources to adjust.
The recording industry isn’t going to go anywhere as long as there continues to be a ton of musicians who need to record.
“Can I make my room soundproof?”
Short Answer: Yes
Long Answer: You can technically soundproof any room. Keep in mind that it can be quite expensive to do it properly. You need to have thicks walls and flooring. If you don’t, then you’re going to fix your room.
Once your room is set-up as need be, you need to add a ton of soundproofing panels. You can buy a 48 pack of these for under $100-dollars which isn’t too bad. Keep in mind to have acoustic wedge panels for cracks like your door.
For a cheaper option, you can use blankets and bookcases across your room. Although this isn’t as effective, you’ll definitely soundproof your room to a certain degree with this method.
“Is owning a recording studio profitable?”
Short Answer: Yes
Long Answer: The initial expense of a professional recording studio tends to be very high. This tends to make people think that owning a studio isn’t profitable. If you’re a good enough recording engineer, then you can easily make a lot of money from your studio.
You just need to make sure you have a smart business plan that you can execute. If you go into the recording industry thinking you’re going to be rich, realize how difficult it can be.
“Where should I move to if I want to open my own home recording studio?”
In the United States, the old answer would be to move to either Los Angeles or New York City. Today, that standard has changed because of how oversaturated those two cities have become. The cities being oversaturated with recording engineers make it more difficult for newbies of the city to find work.
Your best bet is to either stay where you are or find a decently sized city. If you already live in a city that has a thriving music scene, then you should just stay there. Chances are you’ll get more work because you’re from the same city as the musicians living there.
If you live in the middle of nowhere, then just do some research on cities with great music scenes. Any city that has a population over 250,000 will typically have a good enough music scene for you to thrive in.
“How much should I charge once I finish building my studio?”
This all depends on your expertise. If you feel that you’re experienced as a recording engineer, then you should charge at least $30 to $50 dollars per hour. Always charge per hour because you never know how long you might end up working.
If you’re relatively new to the entire recording industry, then charge around $20 per hour. Once you become more experienced, you can start to charge more.
No matter your expertise, make sure you never under-sell yourself. Never negotiate with people, and always stick to your hourly rate. If you don’t stick to your hourly rate, then you’ll always be underpaid.
“What is the easiest recording software for beginners?”
There is quite a few recording software that is made for beginners. Depending on your computer, you might already have recording software on it that you don’t know about. Make sure to only use a free recording software as a beginner. Starting out on a professional level software will only confuse you.
Audacity is an open-source platform for Windows, Mac OS, and Linux. Audacity is one of the more popular recording software since it’s available everywhere. You can download it online, and get to work right away.
If you already own a Mac, then check out Garageband. Garageband is completely free and pre-downloaded on all apple computers. The program is very easy to use and is one of the most commonly used software for beginners.
Once you’re ready to branch off into using a more professional software, try utilizing free trial versions of a specific software. This will help you determine which professional software is best for you.
“What recording software do professionals use?”
There is a plethora of recording software that professionals use. All of which can be a bit pricey. Definitely don’t buy any type of recording software until you know exactly what you’re doing. It’d be a waste for you to spend money on something you don’t know how to use.
The industry-standard program is Pro Tools. Since its release in 1989, it’s available on Windows and Mac. It has become the best recording software for professionals to use.
There is also a free version of Pro Tools called “Pro Tools First”. If you’re looking to see how Pro Tools is, check out the free version of it. Although it’s way more simpler, it’ll give you a general idea of how Pro Tools works.
“How does recording in a home studio work?”
Recording in a home studio works just how you would record in a professional recording studio. You might not find it to be as big as a professional studio, but if you’re a good enough engineer you’ll definitely be able to craft some wicked tunes.
As a musician, recording in a home studio is great because of how relaxed it is. You typically don’t have any time restraints, and can just make music in the comfort of a house.
As a recording engineer, recording in your home is incredible. You’ll be able to have your “space” be exactly how you see fit. You’re your own boss and decide on how you want everything to be. There is nothing better than having your own recording studio. Especially in the comfort of your home.
“How can I build a home studio in a small living space?”
Although you won’t be able to build as nice of a studio, you can still build a viable studio in a small space. All you need is a decent computer, recording software, an audio interface, and a microphone.
If your space is small to the point that you aren’t able to record a drumkit, make sure you have a MIDI keyboard. This will make it possible for you to have some sort of drumming option available.
Don’t be discouraged by the size of your studio. Any sort of home studio should be an accomplishment. Especially if you built the studio by yourself.
“What should I avoid while building a studio?”
The two most important things to avoid while building your own studio is impatience and jumping ahead of yourself.
If you’re impatient, you will give yourself negative energy and not be able to build your studio how you want. You need to make sure your mental state is good throughout this entire process. Always keep a positive mental attitude and reward yourself when you accomplish something.
If you jump too far ahead of yourself, you might dig yourself into financial trouble. Make sure you have enough funds to cover everything; including your bills.
Basically, just have fun doing this. You’re building your own studio, and it should be fun. Invite friends over to help, be proud of yourself, and enjoy the process.
“Should I work at a recording studio before I build my own?”
This depends on how serious of a recording engineer you are.
If you want to be a professional recording engineer, then definitely spend some time at a studio. A lot of recording studios offer internships and will be great places for you to learn the ropes of the job. You can ask questions, and learn important insight on what you should do to maximize your ability.
If you just want to build a home recording studio for fun, then don’t worry about working at a different studio beforehand. Just have fun with it, and learn as you go.
You’ll always gain more knowledge by working at another studio. You might want to consider this if you already work as a recording engineer at your own home. You can find out how much they charge, what their day looks like, and much more. It’s always better to have experiences than to try and do everything yourself.
“Can I rent out my home studio?”
Since it is your house, you can do anything you want with it. Just make sure you have the proper paperwork to rent out a part of your house.
Being able to rent out your studio to recording engineers will give you another source of income. Plus you’ll be able to meet fellow recording engineers and make connections.
All in all, it sounds like a great thing, but keep in mind the amount of strangers you might have in your house. If you really want to rent it out, then only have people you can trust in your home. Never just randomly bring people in. Talk to them, and do some research on them. For all you know they can be a scammer looking to steal your equipment.
Final Thoughts
Being able to set up a spare bedroom as a home studio is an incredible accomplishment. Once you finish your studio, you’ll have a space that’ll be yours forever.
You’ll be able to record whenever you want and be able to record others in the comfort of your own home. You’ll never need to head into a studio that’s far away and deal with annoying people. You work by yourself and can get straight from bed to work within a few steps.
Upon reading this article you learned about picking the right room to record in, and how to properly sound treat it. You learned about essential gear, and gear that may be forgotten about. Always be mindful of the gear you need for a studio. You learned about connecting your gear and positioning your studio monitors.
I help this article helps you accomplish your dream of having your own studio. Get to work on your studio as soon as possible. It might seem like it’ll take forever, but it might go a little faster than you might realize. Just dive in, and get started.
Once you’re finished, you’ll be happy you started.


About the Author

Michael-B is a Music Producer, Musician, and Formally Trained (and was Certified by the Recording Institute of Detroit in 1986) Recording Engineer. As of to date, He's built 3 home recording studios go back to 1987, where he wrote, played all the instruments, and recorded his music. Michael B is also a Writer, Chief Editor and SEO of TrackinSolo.com