
So, you want to record your electronic drum kit, huh? Well, you’re in luck because today we’re going to delve into the fascinating world of recording electronic drums. Whether you’re a drummer looking to share your beats with the world or a producer trying to capture that perfect drum sound for your next hit track, we’ve got you covered. From finding the right equipment to setting up your recording space, we’ll walk you through the essential steps to ensure your electronic drums sound amazing on any recording. So grab your sticks, adjust your headphones, and let’s dive in!
Choosing the Right Equipment
When it comes to recording electronic drums, selecting the right equipment is crucial to achieving high-quality results. There are several key components that you need to consider, including the digital audio workstation (DAW), drum module, drum triggers, and drum amplifiers.
Selecting a Digital Audio Workstation (DAW)
The digital audio workstation, or DAW, is the software program that will serve as the central hub for recording, editing, and mixing your drum tracks. There are many options available, each with its own set of features and capabilities, so it’s important to choose one that suits your needs and preferences.
Consider factors such as ease of use, compatibility with your operating system, available plug-ins and effects, and the overall workflow of the DAW. Popular choices among drummers include Pro Tools, Ableton Live, Logic Pro, and Reaper. Take the time to experiment with different DAWs to find the one that feels most comfortable and intuitive to you.
Choosing the Right Drum Module
The drum module is the brain of your electronic drum kit, responsible for generating the sounds of the drums and cymbals. When selecting a drum module, consider the variety and quality of the available sounds, the ease of customization and programming, and the compatibility with your DAW.
Some popular drum module options include the Roland TD-50, Yamaha DTX700, and Alesis Strike Pro. It’s essential to spend time exploring and experimenting with different modules to find the one that best suits your musical style and preferences.
Selecting the Ideal Drum Triggers
Drum triggers are sensors that capture the impact of your drumsticks on the electronic drum pads. These triggers convert the physical hits into MIDI signals that are then sent to the drum module to trigger the corresponding drum sounds. The quality and accuracy of your drum triggers can significantly affect the realism and responsiveness of your electronic drum kit.
Consider factors such as sensitivity, durability, and compatibility with your drum pads when selecting drum triggers. Popular options include the Roland RT-30 series triggers and the ddrum Acoustic Pro triggers. It’s essential to ensure that your drum triggers are compatible with your drum pads to achieve optimal performance and accuracy.
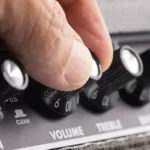
Investing in High-Quality Drum Amplifiers
While electronic drums are designed to be played with headphones for quiet practice, investing in high-quality drum amplifiers is essential if you plan to record your drum kit in a live setting or require a more robust sound for performance purposes. Drum amplifiers allow you to truly feel the impact of your playing and add depth and power to your drum sound.
When choosing drum amplifiers, consider factors such as power output, frequency response, and portability. Popular options include the Roland PM series and the Yamaha DXR series. It’s important to choose amplifiers that complement the overall sound of your drum kit and provide the necessary clarity and projection in your recording environment.
Setting Up Your Electronic Drum Kit
Now that you have chosen the right equipment for your drum recording setup, it’s time to set up your electronic drum kit. Proper assembly and positioning are essential to ensure optimal playability and accurate triggering of the drum sounds.
Assembling the Drum Set
Start by assembling your electronic drum set according to the manufacturer’s instructions. This typically involves attaching the drum pads to the drum rack, connecting the cables, and ensuring that all components are securely tightened.
Pay attention to the height and angle of the drum pads to ensure a comfortable playing position. Adjust the drum rack accordingly to accommodate your preferred drumming style and posture.
Positioning the Drum Triggers
Proper positioning of the drum triggers is crucial for accurate detection of your drumstick hits. Align the drum triggers with the center of each drum pad, ensuring that they are firmly attached and in contact with the drum surface.
Experiment with the positioning of the triggers to find the sweet spot where the drum sounds are triggered most accurately and consistently. Make small adjustments and test the responsiveness of the triggers until you achieve optimal performance.
Connecting the Drum Triggers to the Drum Module
Once the drum triggers are positioned correctly, connect the cables from each trigger to their respective inputs on the drum module. Ensure that the connections are secure and free from any interference that may affect the signal.
Refer to the manufacturer’s manual for specific instructions on how to connect the drum triggers to the drum module. It’s important to follow the recommended cable routing and avoid any potential cable tangling or interference issues.
Connecting the Drum Module to the Audio Interface
To capture the drum sounds in your DAW, you need to connect the drum module to an audio interface. The audio interface acts as a bridge between the analog signals from the drum module and the digital signals that can be processed by your computer.
Connect the audio output of the drum module to the inputs of your audio interface using the appropriate cables. Ensure that the connections are secure and that the levels are properly set to avoid clipping or distortion.
Also, make sure to set the input settings in your DAW to correspond with the audio interface inputs. Refer to the manufacturer’s instructions for your specific setup to ensure proper configuration.

This image is property of images.unsplash.com.
Preparing Your Recording Environment
Creating an optimal recording environment is crucial for capturing clean and professional-sounding drum recordings. There are several considerations you need to keep in mind to ensure the best possible results.
Room Acoustics Consideration
The acoustics of your recording space can greatly impact the sound of your drum recordings. Ideally, you want to achieve a balanced and controlled acoustical environment that minimizes unwanted reflections and reverberations.
Consider factors such as room size, shape, and the materials used in the room’s construction. Hard surfaces such as concrete walls and hardwood floors tend to create more reflections, while softer surfaces such as carpeting and curtains can help absorb sound.
Reducing Background Noise
Background noise can negatively affect the clarity and quality of your drum recordings. It’s important to minimize any potential sources of noise in your recording environment.
Consider factors such as ambient noises from outside, electrical hums, air conditioning noise, and any other unwanted sounds that can find their way into your recordings. Take measures such as soundproofing the room, closing windows and doors, and using noise-reducing equipment like acoustic panels or sound baffles.
Using Acoustic Treatment
Acoustic treatment plays a crucial role in achieving a well-balanced and controlled sound in your drum recordings. By strategically placing acoustic panels or diffusers, you can improve the overall sound quality and reduce unwanted reflections and standing waves.
Consider positioning acoustic treatment panels on the walls, ceiling, and corners of the recording space. Experiment with different placements to find the optimal balance between absorption and diffusion based on your specific room characteristics.
Positioning Microphones for Optimal Sound Capture
Microphone placement is a critical factor in capturing the true essence and character of your drum sound. The position and angle of the microphones can greatly affect the tonal balance, stereo imaging, and overall sound quality of your recordings.
Experiment with different microphone techniques, such as close-miking, overhead placement, and room miking, to find the best setup for your drum recording. Consider factors such as the size of the room, the desired level of detail, and the specific sound you want to achieve.
Configuring Your Drum Module and DAW
Once your electronic drum kit and recording environment are set up, it’s time to configure your drum module and DAW to ensure seamless integration and optimal performance.
Setting Up MIDI Output
Most drum modules can send MIDI data to your DAW, allowing you to trigger virtual instruments or record MIDI data for future editing and manipulation. To set up the MIDI output, connect the MIDI output from your drum module to the MIDI input of your audio interface or MIDI interface.
Configure the MIDI settings in your drum module to correspond with the MIDI channels and note assignments in your DAW. This allows for accurate tracking of your drum performance and ensures that the correct drum sounds are triggered when playing.
Adjusting Drum Sounds and Parameters
Take the time to familiarize yourself with the sound editing capabilities of your drum module. Experiment with different drum sounds, adjust parameters such as tuning, muffling, and reverb, and create an individualized drum sound that complements your musical style.
Refer to the manufacturer’s manual for specific instructions on how to edit and customize drum sounds on your module. Explore the various menu options and settings to unlock the full potential of your drum module and create unique and inspiring drum sounds.
Mapping Triggers to Sounds in the Drum Module
Each drum trigger on your electronic drum kit corresponds to a specific drum sound in your drum module. It’s crucial to map the triggers correctly to ensure that the appropriate sound is triggered when you strike a specific drum pad.
Refer to the manufacturer’s manual for instructions on how to assign triggers to specific drum sounds. Some drum modules allow for customization and fine-tuning of trigger sensitivity and response, so take the time to adjust these settings according to your playing style and preferences.
Configuring Audio Inputs and Outputs in the DAW
To record and monitor your drum performances in your DAW, you need to configure the audio input and output settings. Set the input channel in your DAW to correspond with the audio interface inputs connected to your drum module.
Ensure that the sample rate and buffer size in your DAW are optimized for low latency recording. Adjust the buffer size as needed to achieve the lowest possible latency without sacrificing system stability.
Set up multiple audio tracks in your DAW to capture the individual drum sounds, allowing for greater flexibility in the mixing and editing stage.

This image is property of images.unsplash.com.
Recording Techniques
Now that your electronic drum kit setup and configuration are complete, it’s time to explore various recording techniques to capture the best possible drum sounds in your recordings.
Choosing the Right Microphones
The choice of microphones can greatly impact the tonal quality and character of your drum recordings. Different microphones excel in capturing certain aspects of the drum sound, so it’s important to choose the right microphones for each drum component.
Consider using dynamic microphones for close-miking the individual drums and condenser microphones for capturing the overhead and room sound. Experiment with different microphone models and polar patterns to find the combination that best suits your desired sound.
Deciding on Mic Placement
Microphone placement is crucial in capturing the desired sound from each drum component. Experiment with different microphone placement techniques to achieve the desired balance, stereo imaging, and tonal quality.
For close-miking, position the microphones close to the drumhead, slightly off-center, to capture the fullness and attack of the drum sound. For overhead and room microphones, experiment with different heights and distances to achieve the desired stereo width and depth.
Implementing Multi-Channel Recording
Recording each drum component on separate tracks allows for greater flexibility and control during the mixing and editing process. By capturing each drum sound individually, you can apply specific processing and achieve a well-balanced drum mix.
Set up multiple audio tracks in your DAW to correspond with each drum pad or drum trigger. Adjust the input routing accordingly, ensuring that each track captures only the intended drum sound.
Utilizing Virtual Instruments and Sound Libraries
In addition to capturing the sound of your electronic drum kit, you can also enhance your drum recordings by incorporating virtual instruments and sound libraries. These resources provide access to a wide range of high-quality drum sounds and effects that can add depth and complexity to your recordings.
Experiment with different virtual instrument plugins and drum sound libraries that are compatible with your DAW. Take advantage of the vast selection of drum kits, percussion instruments, and creative effects to create unique and inspiring drum tracks.
Recording Tips and Best Practices
As you embark on your drum recording journey, there are several tips and best practices that can help you achieve the best possible results. These techniques, when implemented, can greatly enhance the quality and realism of your drum recordings.
Recording in Layers
Recording in layers involves capturing each drum component separately, allowing you to focus on the nuances and performance of each individual sound. By layering the drum tracks, you can achieve greater control and balance in the mixing stage.
Experiment with layering different drum sounds to create unique and impactful drum tracks. Consider blending different drum kits, adding percussion elements, or applying creative effects to enhance the overall sound.
Using Click Tracks or Metronome
To ensure precise timing and synchronization in your drum recordings, consider using a click track or metronome during the recording process. These tools provide a constant reference for tempo and help keep your playing in time.
Set the desired tempo in your DAW and route the click track to your headphones or monitor mix. Adjust the volume of the click track to a comfortable level that allows you to follow the beat without distracting or overpowering your drum playing.
Optimizing MIDI Latency
Latency, the delay between hitting a drum pad and hearing the sound, can be a hurdle when recording electronic drums. Optimizing MIDI latency is crucial to achieving a natural and responsive feel.
Adjust the buffer size in your audio interface settings to reduce MIDI latency. Lower buffer sizes typically result in lower latency but can put a strain on your computer’s processing power. Find the balance that provides the lowest latency without causing audio artifacts or system instability.
Monitoring and Adjusting Levels
Monitoring and adjusting levels during the recording process is vital to ensuring that the drum tracks are captured at optimal levels without clipping or distortion. Overloading the input levels can result in poor sound quality and may not be recoverable in the mixing stage.
Monitor the input levels in your DAW or audio interface meters, ensuring that the levels are within an acceptable range. Use the gain controls on your drum module or audio interface to adjust the input levels accordingly.

This image is property of images.unsplash.com.
Editing and Mixing Your Drum Recordings
Once you have recorded your drum tracks, it’s time to move into the editing and mixing stage. This is where you can refine and polish your recordings, ensuring that each drum sound sits well in the mix and contributes to the overall sonic balance.
Cleaning Up the Tracks
Take the time to clean up your drum tracks by removing any unwanted noise, bleed, or excessive room ambience. Use editing tools in your DAW to cut out unwanted sections, crossfading between drum hits, and ensuring a smooth and consistent drum performance.
Pay attention to details such as crossfade length, transient shaping, and sample replacement to achieve a polished and professional drum sound. Edit the drum tracks in a non-destructive manner, allowing for further adjustments and tweaks in the mixing stage.
Quantizing and Correcting Timing
Drum performances may not always be perfectly in time, and correcting timing inconsistencies is a common practice in drum recording. Utilize the quantization features in your DAW to align the drum hits to the desired grid or rhythm.
Experiment with different quantization settings to achieve the desired feel and groove while maintaining the natural dynamics of the performance. Be mindful of preserving the human element in the drum tracks and avoid over-quantizing, which can result in an overly robotic sound.
Adding Effects and Processing
Effects and processing play a crucial role in shaping the overall sound of your drum tracks. Experiment with different types of effects, such as EQ, compression, reverb, and delay, to add depth, character, and polish to your drum sound.
Consider using EQ to balance the tonal frequencies of each drum component, compression to control the dynamics, and reverb and delay to add space and ambience. The specific processing techniques will vary depending on the genre and style of music, so trust your ears and experiment with different settings.
Balancing and Panning the Drum Tracks
Achieving a well-balanced and cohesive drum mix involves careful attention to the volume levels and panning of each drum component. Adjust the fader levels of each drum track to achieve a good balance where no individual drum component dominates the mix.
Experiment with panning the individual drum components to create a sense of space and stereo separation. Consider the positioning of the drums on your electronic drum kit and mimic the stereo placement in your mix to achieve a realistic and immersive drum sound.
Enhancing the Drum Sound
To take your drum recordings to the next level, it’s important to explore techniques for enhancing and shaping the drum sound in creative and unique ways. This allows you to create drum tracks that stand out and make a lasting impression.
Applying EQ Techniques
EQ is a powerful tool for shaping the tonal characteristics of your drum sound. Use EQ to boost or cut specific frequency ranges to enhance the attack, body, or resonance of each drum component.
Experiment with different EQ techniques such as cutting low frequencies to reduce muddiness, boosting high frequencies to add sparkle and definition, or creating a scooped midrange to achieve a modern and punchy drum sound. Pay attention to the interaction between the EQ settings of each drum component and ensure that they complement each other in the mix.
Adding Compression for Dynamics
Compression helps control the dynamic range of your drum sound, ensuring that the quietest hits are audible and the loudest hits are not overpowering. Apply compression to each drum component individually or consider using parallel compression techniques for added punch and sustain.
Experiment with different compression settings such as attack, release, and ratio to achieve the desired balance between sustain and natural dynamics. Be cautious of over-compressing, as it can result in an unnatural and lifeless drum sound.
Using Reverb and Delay Effects
Reverb and delay effects are essential for adding depth, space, and ambience to your drum sound. These effects can help create a sense of realism and naturalness, placing your drums in an acoustical environment.
Experiment with different reverb types, such as plate, hall, or room, to find the one that complements your drum sound. Adjust the reverb decay time and pre-delay to achieve the desired sense of space and ambience.
Utilize delay effects to create rhythmic patterns, add depth and movement, or achieve unique creative effects. Experiment with different delay settings, such as tempo-synced delays or ping-pong delays, to add interest and complexity to your drum tracks.
Experimenting with Drum Sample Libraries
Drum sample libraries are a valuable resource for adding variety and sonic versatility to your drum recordings. These libraries provide access to a vast selection of high-quality drum sounds, allowing you to explore different drum kits, genres, and styles.
Experiment with different drum sample libraries that are compatible with your DAW. Load the samples onto the corresponding drum components in your drum module and blend them with your recorded drum sounds. This allows for endless possibilities in creating unique and captivating drum tracks.

Mastering Your Drum Recordings
The final step in the drum recording process is mastering your drum tracks to achieve a polished and cohesive final product. Mastering involves balancing the overall mix, applying final touches, and preparing the tracks for distribution or release.
Applying Final Touches
In the mastering stage, focus on the fine details and nuances that enhance the overall sound and impact of your drum tracks. This can include minor level adjustments, eq frequencies to achieve tonal balance, and overall dynamic processing to optimize the perceived loudness.
Be cautious not to overdo the processing at this stage, as it can lead to a loss of dynamics and overall clarity. Use subtle and transparent mastering techniques to enhance the sonic characteristics of your drum tracks while maintaining the integrity of the original recordings.
Balancing the Overall Mix
During the mastering process, it’s important to ensure that the drum tracks sit well within the context of the overall mix. Consider the balance between the drums and other instruments, ensuring that no element overpowers or gets lost in the mix.
Make small adjustments to the fader levels or apply additional EQ and compression to achieve a cohesive and balanced mix. Pay attention to frequency masking, where certain frequencies in the drum tracks may clash or mask frequencies in other instruments. By making careful adjustments, you can achieve clarity and separation within the mix.
Using Limiters and Maximizers
Limiters and maximizers are essential tools in the mastering stage for achieving a consistent and competitive overall volume level. These tools help control the peak levels of the drum tracks, ensuring that the tracks are perceived as loud and impactful without distortion.
Apply a limiter or maximizer plugin to the master output of your DAW. Adjust the threshold and output gain settings to achieve the desired loudness and impact. Be mindful of the trade-off between loudness and dynamics, as excessive limiting or maximizing can result in a compromised and lifeless sound.
Exporting the Final Drum Track
Once you are satisfied with the mastering of your drum tracks, it’s time to export the final drum track for distribution or further processing. Set the desired file format, bit depth, and sample rate according to the requirements of your intended use.
Export the drum track as a high-quality audio file, ensuring that the settings are optimized for the best possible sound and compatibility with various playback systems. Give the final file an appropriate name and location for easy access and organization.
Conclusion and Final Thoughts
Recording electronic drums can be an exciting and rewarding experience, allowing you to capture and unleash your creativity. By selecting the right equipment, setting up your drum kit properly, preparing your recording environment, configuring your drum module and DAW carefully, and implementing effective recording techniques, you can achieve professional-quality drum recordings.
Remember to experiment, explore, and have fun along the way. Every drummer and recording setup is unique, so take the time to discover your own sound and style. With practice and perseverance, your drum recording skills will continue to grow and evolve, opening up new possibilities for creativity and musical expression.


About the Author

Michael-B is a Music Producer, Musician, and Formally Trained (and was Certified by the Recording Institute of Detroit in 1986) Recording Engineer. As of to date, He's built 3 home recording studios go back to 1987, where he wrote, played all the instruments, and recorded his music. Michael B is also a Writer, Chief Editor and SEO of TrackinSolo.com