![Converting an Unfinished Space to a Home Recording Studio in [2023]](https://trackinsolo.com/wp-content/uploads/2022/01/converting-unfinished-space-home-recording-studio.webp "Converting an Unfinished Space to a Home Recording Studio in [2023]")
Most musicians or recording engineers are overwhelmed with the idea of converting an unfinished space into a home recording studio. Despite this feeling of anxiety, most musicians or recording engineers dream about converting an unfinished space to a home recording studio.
The benefit of having your own home recording studio is something every musician or recording engineer should strive for. You can wake up and immediately being recording or creating. The convenience of it all is great for the creative process.
In this article, you’ll learn about the basics on how to convert an unfinished space into a home recording studio.
After reading this, you’ll feel more confident in your ability to plan out, design, and finish your own home recording studio.
Location

Everyone’s living situation is different, but keep in mind that you’ll need at least an open room available for your recording.
Besides having the option of utilizing an extra room in your house, there are some places on your property you might’ve not initially considered.
Try thinking outside of the box and think about areas of your property you may be able to use. Below are a few ideas to help you to consider all of your options:
Basement
A basement is great because they’re usually big and wide-open enough to be easily manipulated. If you have a basement that isn’t crammed with stuff, consider this as your recording studio. Even if you use your basement as a “storage area”, clean it out! You’ll more than likely be shocked at what you can do with it.
Garage
Although this seems odd, you can actually utilize your garage as a recording studio. If you can fit two cars in your garage, why can’t you use it as your recording studio? Just be sure to go over with whoever else lives with you to make sure you’re not inconveniencing everyone. Better to double-check with the people around you on taking up an entire garage.
Shed
Most people barely use their shed for anything besides storage. If you have a shed, you may want to consider expanding on it and making it your own recording studio. What better way to have a recording studio than your own little space right outside of your home? It can’t be better than that.
Attic
Although most people’s attics are too small to be used for a recording studio, some houses will randomly have a large attic. If your attic is practically an entire floor then this is a perfect place for your recording studio. Think of it as an expanded room; making it easier for you to create your own studio.
The most important part about picking the location of your studio is that its convenient for you. You’ll spend a lot of time in this place creating, recording, writing, and releasing your positive energy into something.
It’s better to go somewhere that’s convenient and good for you to use. Otherwise, you won’t go into this space as much as you should.
Blueprint

After you pick your location, you’re going to want to come up with a blueprint. This blueprint isn’t what you want to accomplish by tomorrow. Think of it as your “end” goal.
Make sure that certain sections of this blueprint have goals of their own. Breaking everything down to exact steps will make it easier for yourself to accomplish. Doing this will ensure the completion of your studio at some point.
A blueprint is a plan, and you can’t accomplish anything without a proper plan. If you start to build your recording studio without any sort of blueprint, you’ll more than likely will have to backtrack.
Backtracking will cause you to delay your recording studio; making you to want to give up. The important thing is to not give up and to execute your blueprint.
Below are some steps to write down for your blueprint:
Location
As noted earlier, you’re going to want to figure out exactly where you want your studio to be. This will make it easier for your planning.
Budget
Having a budget will help you figure out how much you’re willing to spend and what you’re going to invest into it. For example, maybe you don’t want to spend thousands of dollars. Then you should figure that out before you start smashing up walls.
Goals
Write down exactly what you want to accomplish and the date in which you’ll accomplish it. This should be done in steps. For example, you can put down a one month, three month, six month, and one year goal. Doing this will allow you to fully understand what you want to accomplish.
A blueprint is an outline for the actual construction of your studio. But I think it’s important to add your goals and budget to it so you see a wider range of information surrounding your studio. Doing this will only make it easier for the finished product of your studio.
One, Two, Three or More Room Studio
One Room

Although I said earlier in this article that having a lot of space is a big part of a recording studio, sometimes you can only work with what you have.
If you only have one room available to work with then you’ll have to do what you have to do. Keep in mind that if you only have one room to work with then you’ll need to use sound baffles.
If you are unfamiliar with sound baffles, below is a bullet point that quickly explains what a sound baffle does.
Sound Baffles
If you have any knowledge about recording studios then you know that properly sound-treating a room is a must. Sound baffles are a cheap and effective way to sound treat a single room.
You can use them to help sound treat the room for recording drums, bass, guitar, or whatever. Depending on the frequency of the instrument you’re going to want a few different sound baffles to utilize. You can either buy sound baffles online or build them yourself. There are plenty of guides online on how to build them yourself if you want to save a few bucks.
As noted countless times, a single room isn’t ideal for a recording studio, but you work with what you have. Keep in mind to use sound baffles to help you perfect the sound of your studio.
For more information on Acoustic Panels, Bass Traps, and Diffusers. Read our reviews for Best Acoustic Panels Review & Buyer’s Guide, Best Bass Traps Review & Buyer’s Guide, and Best Acoustic Diffusers Review & Buyer’s Guide.
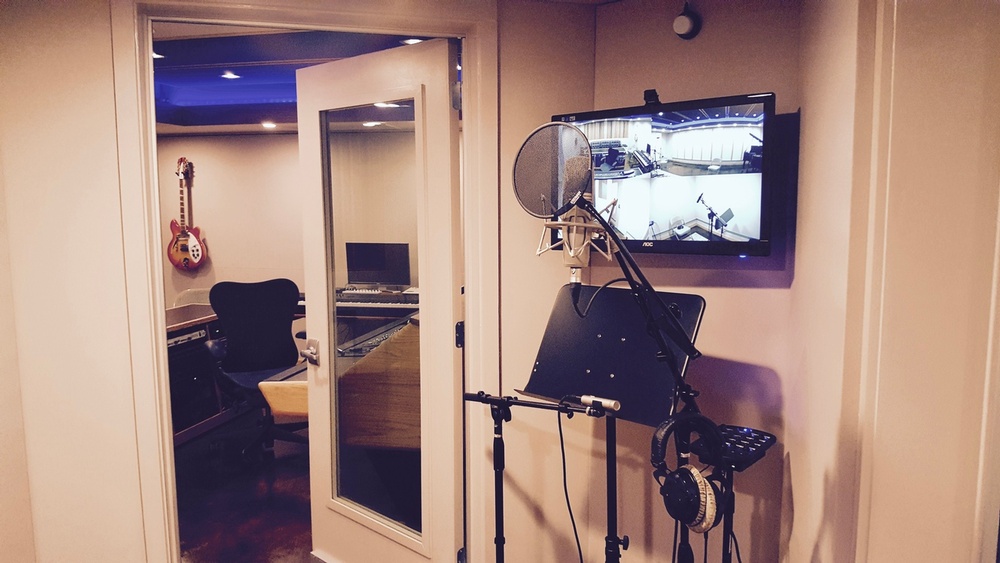
Two Rooms (Control Room and Studio)

If you have two rooms to use for your recording studio then that’s great. You’re going to want to use one as your control room and the other as the actual studio.
Below are a few points on how to decide which room should be what:
Control Room
Generally speaking, your control room should be smaller than your studio. However, you’re going to want to make sure your control room is nice and comfortable since this is where you’re going to be spending most of your time.
Make sure this room is big enough to have your desk and enough space for people to hang out in. You don’t want it to be too cramped. Otherwise, you’ll be annoyed by how small of a space you have to sit in.
Studio
As noted, your studio should be larger than your control room so definitely pick the larger room as your studio. This room needs to big enough to record drums, guitar, bass, and much more. Keep in mind you’ll be storing a lot of your gear in here too.
You definitely want this room to be as perfect as possible since this is where the actual sound of your recordings will be from.
Besides a control room and studio, just keep in mind the importance of each. A control room needs to be comfortable, whereas a studio needs to be large.
Also, make sure these rooms are isolated from one another.
Don’t get me wrong you don’t want them to be significantly far away from one another since it’ll be too difficult for you to record properly. Ideally, you’ll want them right by each other, but not touching in any way.
If need be, you can utilize a basement as your studio and the room above it as your control room.
With regard to these two rooms, just keep in mind how far these two rooms are from one another and if they’re isolated or not.
Three Plus or More Rooms (Control Room, Main Studio, Isolation Booth, etc)

If you’re lucky enough to have three or more rooms available to use for your recording studio then that’s great. Besides a control room and studio, here are a few bullet points of other rooms you should consider creating for your recording studio:
Isolation Booth
An isolation booth is great for vocals. If you have a room that is very small then consider making it your isolation booth. Even if it’s as small as a closet, it can be a perfect isolation booth. Besides vocals, an isolation booth is great for recording guitar amplifiers, acoustic guitars, and more.
Storage Room
Just about any recording studio has a ton of gear that comes along with it. If you have a lot of gear, then you’re going to need storage for it. If you have some extra space, convert it into a storage space.
Make sure everything is organized so you can find anything you’re looking for very easily. If you don’t, then you’ll more than likely struggle finding something in the future. It’s best to avoid this, and just make it easier for yourself.
Side Studio
Although this isn’t as common for a home studio because of space issues, if you have enough space, create a side studio. A side studio will allow you to choose which studio you want to record in and create flexibility among your options.
For example, you can use your main studio for drums or other loud instruments and your side studio just for guitar amplifiers. It’s honestly just for convenience. Only make a side studio if you have more than enough room. Otherwise, do everything on this list first.
Everything on this list should give you a general idea of what to build if you have a ton of space to work with. Keep in mind that your control room and studio are the two most important aspects of your studio. Everything else is extra, but make sure you build things that are most important first.
Things To Consider

Power Requirements
Generally speaking, you don’t need a ton of power for a home studio. It seems ridiculous considering the amount of activity you’re going to be recording, but keep in mind you’re going to spend most of your time on one computer.
A regular 100a or 400a breaker box is usually good enough for a home studio. However, you may want to have a separate circuit for any high-performance amplifiers or power supplies.
Just do your research on your current power setup. It’s better to have more power than it is to just wing it. If you’re still confused, you can always ask your electric company if your current power setup will be okay. They’ll be more than happy to assist you.
For more information on Uninterruptible Power Supplies. Read our reviews for Best Uninterruptible Power Supply Review & Buyer’s Guide.
Lighting Requirements
For some reason, a lot of people who work in a studio talk about the positive effect that natural lighting has on a studio. Keep this in mind when you’re designing your home studio.
You can find a plethora of “natural lighting lights” online if you don’t have windows in your studio. Keep in mind that the more lights you add, the more power you’re going to need.
If you have a ton of power, to begin with, then go crazy with it and add some lights! If not, you may want to be careful with your lighting until you get more power.
Air Quality with tightly sealed rooms solutions
Air quality is very important when it comes to any recording studio. Although it’s great for a studio to only have one opening to the outside world for sound purposes, it’s horrible for natural airflow.
You’ll need some sort of air ventilation system to bring in fresh air to help deal with the heat caused by your studio.
The truth is, recording studios generate a lot of heat because of all of the equipment and sound treatment in them. If you can generate enough funds to add an air conditioning unit to your studio, definitely do this.
This will not only help with the overall heat of your studio but will positively impact the instruments in your studio. Rooms that are too dry and hot have been known to cause problems. Getting a proper air conditioning unit will fix this issue and put your mind at ease.
Noise from heating and cooling of space solutions
After you installed an air conditioning unit, you may find some noise that can affect your studio. To avoid this, try putting an outside unit on the floor on a concrete or brick base. Doing this will eliminate the noise from getting into your studio.
If you’re still having issues, contact a professional. People who are experts on air conditioning units will be more than willing to help you with your problem.
Construction Materials

You’re probably thinking: “What do I build my studio with?”. For the most part, you’ll build your studio with the same materials you would for any other part of your house. Below are a few details on what materials to consider in a specific part of your recording studio:
Flooring
For studios, you definitely don’t want to use carpet ever. Carpet makes it difficult to move equipment, is easily damaged, and just is generally frowned upon for studios.
Always build the flooring of your studio with hardwood floors. The most common are hardwoods, but besides that, you can use parquet, tile, and concrete. Just make sure you avoid carpet with the floor of your studio.
Walls
The walls of your studio need to be made out of materials that are great for soundproofing. Such as concrete, lead, steel, and vinyl. All of which can be layered on top of one another for a proper studio wall.
There are also a ton of modern options that people use for their studio walls. Just make sure you pick material that is great for soundproofing. Keep in mind that the better the material, the more expensive it’ll be.
Ceilings
Generally speaking, you’ll want a ceiling that is at least 10 feet high. Having a ceiling that is too low will make it difficult for you to record something at its full potential. For the material, you’ll it to be similar to your walls. Something that is great for soundproofing and can be easily manipulated by you.
Create a Room Within a Room

If you have a big enough room, you can build a room within a room. Keep in mind that you generally don’t want the rooms to be too close to each other since isolation is important with recording.
However, if you can build two separate rooms in something like a basement, then that is great. Just remember to keep in mind the importance of sound for these rooms. You don’t want to just build a room within a room for the sake of building a room. Below are a few examples of rooms to build within a room.
A Control Room and Vocal Booth
Since a vocal booth doesn’t need to be too loud or require a lot to be soundproofed, you can easily build a vocal booth in a control room. As noted earlier, a vocal booth can be as small as a closet in a room, and work perfectly. This is one of the most common options for rooms within rooms in recording studios.
A Studio and Storage Space
Since a storage space doesn’t really have any sound requirements, you can build a storage space right in the middle of your main studio. Since most of the equipment you’re going to use will be for your main studio, you might as well have it nearby. Having it nearby will make it nice and convenient for you to switch out and use certain equipment a lot easier.
Utilizing a room within a room is a great idea for any studio. Just keep in mind the effect it can have on your studio, and if it’s worth the trouble to try and do this.
Sound Proofing Doors

Since doors are one of the few ways sound can get in from the outside, keep in mind how you can properly soundproof them. Soundproofing doors are a necessity when it comes to a studio.
You don’t want unwanted noise coming in. Soundproofing a door usually isn’t that expensive compared to other things you have to soundproof for your studio. Below are steps on how to properly soundproof your door:
Seal All of the Cracks
Since the unwanted noise mostly goes through the gaps of your door, you’re going to want to seal them up. You can do this by buying some insulant sealing. If the gaps are too small to use, you can buy a variety of smaller foam products that are made for smaller gaps.
Cover Gaps
You can cover certain gaps on your door with weatherstripping tape or you can buy a door gasket. A door gasket will be more expensive, but will definitely get the job done a lot better.
Soundproof Blanket
The title of this is self-explanatory. Basically, you buy this and throw it over your door. You can make your own rig of it or buy one online. Besides a soundproof blanket, you can buy a few different soundproof panels for your door instead.
Door Sweep
Since most of the unwanted noise comes from under your door, you’re going to want a door sweep. A door sweep will go at the bottom of your door and plug up any noise that tries to get in.
When it comes to doors, you want to fill the door with different soundproofing techniques to stop unwanted noise from getting in. It’s as simple as that. You can either do this by building all of the soundproofing materials yourself, or by buying the products online.
Sound Proofing Windows

Other than doors, the next most important thing to soundproof are windows. Having windows in your studio is great because of the natural lighting it gives your studio.
However, just like doors, they give off a lot of unwanted noise. Below are some options to follow for soundproofing your windows:
Easy solution – Remove the Window
If you don’t want to go through this entire process of soundproofing your window, you can always just remove it. This is easy to do, but may remove that need for natural lighting.
Double-Pane Windows
This is very expensive to do, but definitely worth it. Double-pane windows greatly reduce the noise coming in and will make it a lot easier for you to properly soundproof them.
Buy Sound Deadening Curtains
Something not everyone considers with soundproofing is curtains. Sound-deadening curtains will greatly reduce unwanted noise. You can find a ton of sound-deadening curtains online.
Seal Gaps
Just like you would with your door, you need to seal all of the gaps surrounding your window. Use the same method you would toward your door with your window. It’s as simple as that.
Apply Soundproof Panels to your Windows
If you have enough money, you can put a variety of soundproofing panels around your windows. There are panels that are specifically made for windows that you can find online. Keep in mind that these tend to be expensive.
Although a window is great for a studio to have, it needs to be soundproofed properly. Follow these points to make sure you properly soundproof your window.
Deciding on One or Two Rooms?
As noted, having two rooms for recording is definitely better than only having one room. However, if you try splitting a room in a half for the sake of having two rooms, don’t waste your time.
If you have one large room, you might as well utilize it as your main room for recording. Ideally, you’d like to have at least three rooms designated for a recording studio, but not everyone has that luxury.
Keep in mind to start with studio space for recording, and everything else can come after that. Always prioritize what you’re going to build with the space you do have.
Acoustic Treatment
Typically speaking, the acoustics of a room tend to go unnoticed by a musician or recording engineer while in the midst of planning out their studio. Having the right acoustics for your room will help your studio immensely. Below is a list of some ways to help the acoustics of your studio:
Foam Panels
Foam panels are on the walls to absorb sound reflections. They do a really simple job, but the difference is incredible.
Diffusion
After you use foam panels to absorb reflections, people think the sound of it is too “dead”. With the right combination of diffusion, you can counteract the foam panels and create a perfect sound.
Both of these can be made on your own foam and wood. There are a ton of guides online for you to follow. If you don’t want to waste your time building them, you can buy them online.
Acoustic Panels
In simple terms, acoustic panels are placed on walls to absorb sound. They are generally used to help eliminate unwanted noise and to absorb sound. Acoustic Panels are often confused with soundproofing. Keep in mind that they don’t soundproof, but simply absorb unwanted sound.
Similar to everything in this article, you can either buy acoustic panels or build them on your own. They’re usually made out of foam wedges or fabric wrapper fiberglass. You can find a lot of guides online on how to properly build acoustic panels. Or you can just buy them online if you want to save time.
Bass Traps
Bass traps are used to help obtain low-frequency sounds; hence the name “bass”. People place bass traps in the corner of rooms. They place them in the corner of rooms since low-frequency pressure usually builds up in the corner of rooms. You can also use bass traps for flat walls to enhance your sound.
As you’d guess, you can either build bass traps yourself or buy them online. If you build them, keep in mind that the core of bass traps is absorbent damp material with a frame. Over this is a sheet to make them look more appealing.
Building Acoustic Panels and Bass Traps
With regard to acoustic panels and bass traps, make sure you follow the proper steps to build them. If you build them wrong, you’ll only waste your money, time, and work. As noted, you can find step-by-step guides and videos online. Make sure you do your research.
For more information on Acoustic Panels, Bass Traps, and Diffusers. Read our reviews for Best Acoustic Panels Review & Buyer’s Guide, Best Bass Traps Review & Buyer’s Guide, and Best Acoustic Diffusers Review & Buyer’s Guide.
Floor and Ceiling

The contents of a room can heavily influence the overall sound of the room. As noted, you want to make sure you have the proper flooring needed for a studio. Don’t waste your time with carpet flooring, only get hardwood flooring. Make sure you have a decently high ceiling to work with. If your ceiling is too small, it’ll be way too difficult for you to properly record, sound great, and achieve what you want to accomplish.
Every room is different, so remember to look up what you should do depending on the exact dimensions of your floor and ceiling.
Online is your best friend for projects like this. If you’re unsure what to do about a floor or ceiling, you can find the answer online. Just follow these basic guidelines to help you understand what to do about the floor and ceiling of a room.
Windows
As noted, windows are great for studios because of the natural light they let in. However, standard windows can be more of an annoyance than a positive for a studio.
You typically want a window with a high sound transmission class (STC). Most windows are around 18 to 38 STC. You want to get a window that is at least 48 STC for a studio.
Below is a list of some windows that are offered for studios:
Slanted or Vertical Windows for Sound Studios
The description of these windows is in the title. Similar to slanted or vertical windows, but made with low-frequency noise reduction glass and frame.
Operable Sliding Sound Studio Window
This window is more of a traditional type of window which is almost unheard of for studios. The two sliding windows allow you to open the windows and access the outside. It’s crazy.
You can find a few other variations of soundproof windows online. Just make sure you buy one that has a high STC. Otherwise, you’ll run into some problems.
Connecting Your Gear
Once you have all of your designated areas set up, it’s time to connect everything. Some examples include: figuring out your storage space, connecting your control center to your studio, running cables correctly, etc.
Get all of the basic requirements for connecting your gear done first.
After you connect all of the basic gear, you can spend some time connecting the larger pieces of equipment. Never rush anything because you may run into some mistakes if you rush.
Go over your blueprint and make sure you have everything connected that you planned out. Some people come up with unique ways to run cables. People will run cables through walls, under the floor, etc. Always be on top of connecting your gear.
Once everything is connected, make sure you troubleshoot everything. It’s always better to be safe than sorry. You never know what kind of mistake may come up.
Converting an Unfinished Space to a Home Recording Studio – Q and A

There are always a ton of questions about home studios in general. Below are a few common questions you might ask with regard to this article:
“How much would it cost to start a recording studio?”
This is a very common question. People want to know if they can even think about building a studio because they fear it’s expensive.
The truth is you can build a decent enough studio for a relatively low price. It all depends on what you’re looking to accomplish. If you want a bare-bones studio for fun; then you technically only need a computer.
If you want to build a full-blown professional level studio, then you can spend up to $30,000 USD. Keep in mind that the majority of this money is for gear alone. People spend thousands of dollars on gear to perfect the sound of their studio.
Microphones, amplifiers, effect pedals, audio interfaces, cables, etc; all add up over time.
The important thing to know is that most recording studios are built over a long period of time and open way before they’re finished. You’ll never actually be finished with your studio.
Just continue to invest money in it and after a couple of years, you’ll have a studio that’ll blow anyone away.
“How big does a studio have to be?”
It all depends on what you want to accomplish. For a small recording studio, you technically only need a room that’s big enough to record drums. If you’re not even going to record drums, then all you need is a space for your computer.
The rule of thumb for an actual recording booth is 6 to 7 feet of space.
However, if you want to build a more professional-style studio then you’ll obviously need more space than a single room.
The more room you have, the more you can do and the better it’ll sound. There really aren’t any specific guidelines on how big a studio has to be. It’s really up to you.
“How much do recording studios charge per hour?”
Just like the size of your studio, it’s all up to you. Some recording engineers charge as much as $200 USD per hour while others only charge $15 USD.
I know that when one of my friends first became a recording engineer he charged $15 USD per hour. Now he charges $30 USD.
With experience comes an increase on how much you’re able to make. It’s really just like any other job.
However, some recording engineers charge less or more for mixing and mastering. They usually charge less for both of these since they tend to do them on their own without you present.
It all depends on how much you think your service is worth. If you believe you have a great studio and set of skills to offer, then charge a lot. If you’re beginning and just want to get your first client, then don’t charge a lot.
“What is the best recording studio package?”
Just like anything else, there are a variety of options to pick from for recording studio packages.
For beginners, I recommend getting just a simple audio interface and microphone package. This will help you begin to understand the entire process in a very simple way. Once you get comfortable with it, upgrade and check out some of the more expensive and complicated options that are available.
For experts who are looking to upgrade or continue building their studio, there really aren’t a ton of studio packages meant for you. Most recording packages are meant for beginners.
However, you can find a few different sound treatment packages online that might pique your interest. Besides that, just buy string, cable, and pick packages. You’re going to need them eventually so you might as well buy them now.
“What are the basics for a studio?”
Going through the order of importance I’ll quickly write down a simple list for the basics of a studio.
- A computer
- A DAW software
- An Audio Interface
- A Microphone
For more information. Read our article on Basic Gear Needed for a Home Recording Studio.
These four things are the bare minimum necessities to be able to record. Below is a list of what you need if you want to build a studio:
- A blueprint
- Space available to use
- A budget
- The materials necessary to build the studio in your home
- Sound treatment
- Gear involved in a studio
This is a very general list of what you’ll need to create a home studio. The two most important are the blueprint and the budget behind it.
“What is the best equipment for a home studio?”
This varies from person to person. I don’t want to list specific brands since every brand has people that hate them. Generally speaking, you’ll want:
- A fast computer
- Several audio interfaces offer different options
- Expensive microphones that have good reviews
- Expensive tube amplifiers that have good reviews
- A wide range of effect pedals
- A DAW software that isn’t meant for beginners
As I said, this is kind of difficult to answer since it’s so subjective. The reality is that the “best” equipment varies from person to person. Just buy equipment that has good reviews and try it out in stores.
“Do I need a mixer for home recording?”
No, you don’t need a mixer for home recording. You need an audio interface, microphone, and DAW software for home recordings. Think of a mixer as an add-on that enhances your recording.
Keep in mind that if you want to eventually work in a professional studio you’re going to need to know how to work an actual mixer. Just about all professional studios won’t hire an engineer if they don’t know how to use a mixer.
Since mixers are so expensive people don’t usually buy them for their home studio. However, if you have the extra money then definitely install a mixer. It’s better to have one than it is not to have one.
“Do I need an audio interface if I have a mixer?”
Unless your mixer comes with a built-in audio interface, then you’re going to need an audio interface. Even if your mixer comes with an audio interface, you should buy a few audio interfaces anyways.
Mixers are often confused with audio interfaces for whatever reason.
To clear up the confusion, mixers are used to control what is being sent to your computer. Whereas an audio interface is used to connect your musical instruments or microphones to your computer.
In simple terms, you’ll need an audio interface if you have a mixer.
“How can I soundproof my room for cheap?”
Despite the need for soundproofing, there are actually a lot of DIY ways to soundproof your room for cheap. Below are a few different options for soundproofing your room for a reasonable price:
Egg Crates
Although this isn’t a great method for soundproofing an actual studio, egg crates are great to use for a small non-professional home studio. They help eliminate noise; similar to foam materials but not as effective.
Rugs
It’s generally thought that rugs can help absorb some sound from a room. Although it’s frowned upon to have carpet in your studio, a couple of rugs aren’t a big deal.
Soundproof Curtains
As noted earlier in this article you can find a plethora of soundproof curtains online. Some of which are pretty affordable.
Blankets
If you have a bunch of extra blankets, then hang them up. The blankets act sort of like an acoustic treatment.
Look, if you want to build a perfect recording studio then definitely don’t follow any of these DIY methods. Your best bet is to just spend the money on the best option available for your studio.
“What are some that were recorded in a home?”
The truth is that a lot of great records have been recorded at home studios. Most people think musicians have to go off into a big studio to record their music. When in reality, a lot of musicians like the comfort of recording music at a home.
Here are a few records that have been recorded in a home according to paste magazine:
- Bruce Springsteen – Nebraska
- The Rolling Stones – Exile on Main St.
- Bon Iver – For Emma, Forever Ago
- Bob Dylan and the band – Basement Tapes
- Guided by Voices – Bee Thousand
- Iron and Wine – The Creek Drank the Cradle
- Daniel Johnson – Yip/Jump Music
- Radiohead – Ok Computer
- Mountain Goats – Full Force Galesburg
- Nine Inch Nails – The Downward Spiral
As you can tell, a lot of musicians have used home studios to make some amazing studios. The Foo Fighters made a documentary surrounding their album “Wasting Light” and how they recorded it at Dave Grohl’s house. They brought all of the equipment in and recorded it themselves.
The Black Keys recorded their first several records in Patrick Carney’s basement. It’s really remarkable at the amount of records that have been made in home studios. Use this knowledge to fuel your home studio endeavor!
Final Thoughts
By the end of this article, you should have learned how to convert an unfinished space (basement, garage, shed, etc.) into a home recording studio. At the very least you learned the basics surround the topic.
This article discussed the location, blueprint, sound treatment, room choices, and more surrounding a home studio. Almost everything about this topic was covered.
Having your own recording studio is great. Being able to wake up and record your own music or record others is a new and exciting way of living. The community around home studios is something every musician or recording engineer should strive to be a part of.
The music industry is a family, and people with home recording studios are an even closer family. Once you’re finished you’ll be able to look at something you created. An entire studio that has the possibility of recording music that millions may end up listening to.
When you’re building your studio, just remember what your end goal is. Never give up or be discouraged when something bad comes up. You’re more than likely going to make a mistake or run into a problem.
Just stay focused and you’ll eventually get to your end goal. Once you’re near the end, you’ll be the happiest you’ve ever been.


About the Author

Michael-B is a Music Producer, Musician, and Formally Trained (and was Certified by the Recording Institute of Detroit in 1986) Recording Engineer. As of to date, He's built 3 home recording studios go back to 1987, where he wrote, played all the instruments, and recorded his music. Michael B is also a Writer, Chief Editor and SEO of TrackinSolo.com